Other than balloons and cake, what does every birthday party need? A fabulous banner! I could have simply bought one, but finding the colors I wanted and personalizing it, I would have pulled my hair out & spent more than I desired. So I made my own, with the hope of using parts of it again. This project only takes an hour or so and cost me about $22. And I LOVE it!
Head to your local craft store (Hobby Lobby for me because it's within a mile of my house!) and pick up a few things. This banner is made of felt and chipboard letters, with a pom-pom trim. The phrase "Happy Birthday" is 13 letters long so you'll need at least 13 pieces to your banner. If you add a name, or an exclamation mark, or even the birthday number (1st, 30th, etc), you'll need more obviously. My daughter's name is 6 letters long, so I needed 19 pieces in all.
I was able to make two pieces from each piece of felt, too. I also wanted the colors to match the theme of the birthday party. I'm doing an Oh, the Places You'll Go by Dr. Seuss theme.
I'm also using a lot of polka dot decor so that's what I chose to put the letters on.
Here's what you'll need:
1. Felt pieces.
These are usually 25 cents a piece so if you mess something up, you can cheaply get more. I knew I needed 19 banner pieces and could make 2 per sheet. I also had 6 colors I wanted to use, so I bought 2 of each color. I knew I'd have some leftover in case I needed it.
2. Patterned felt.
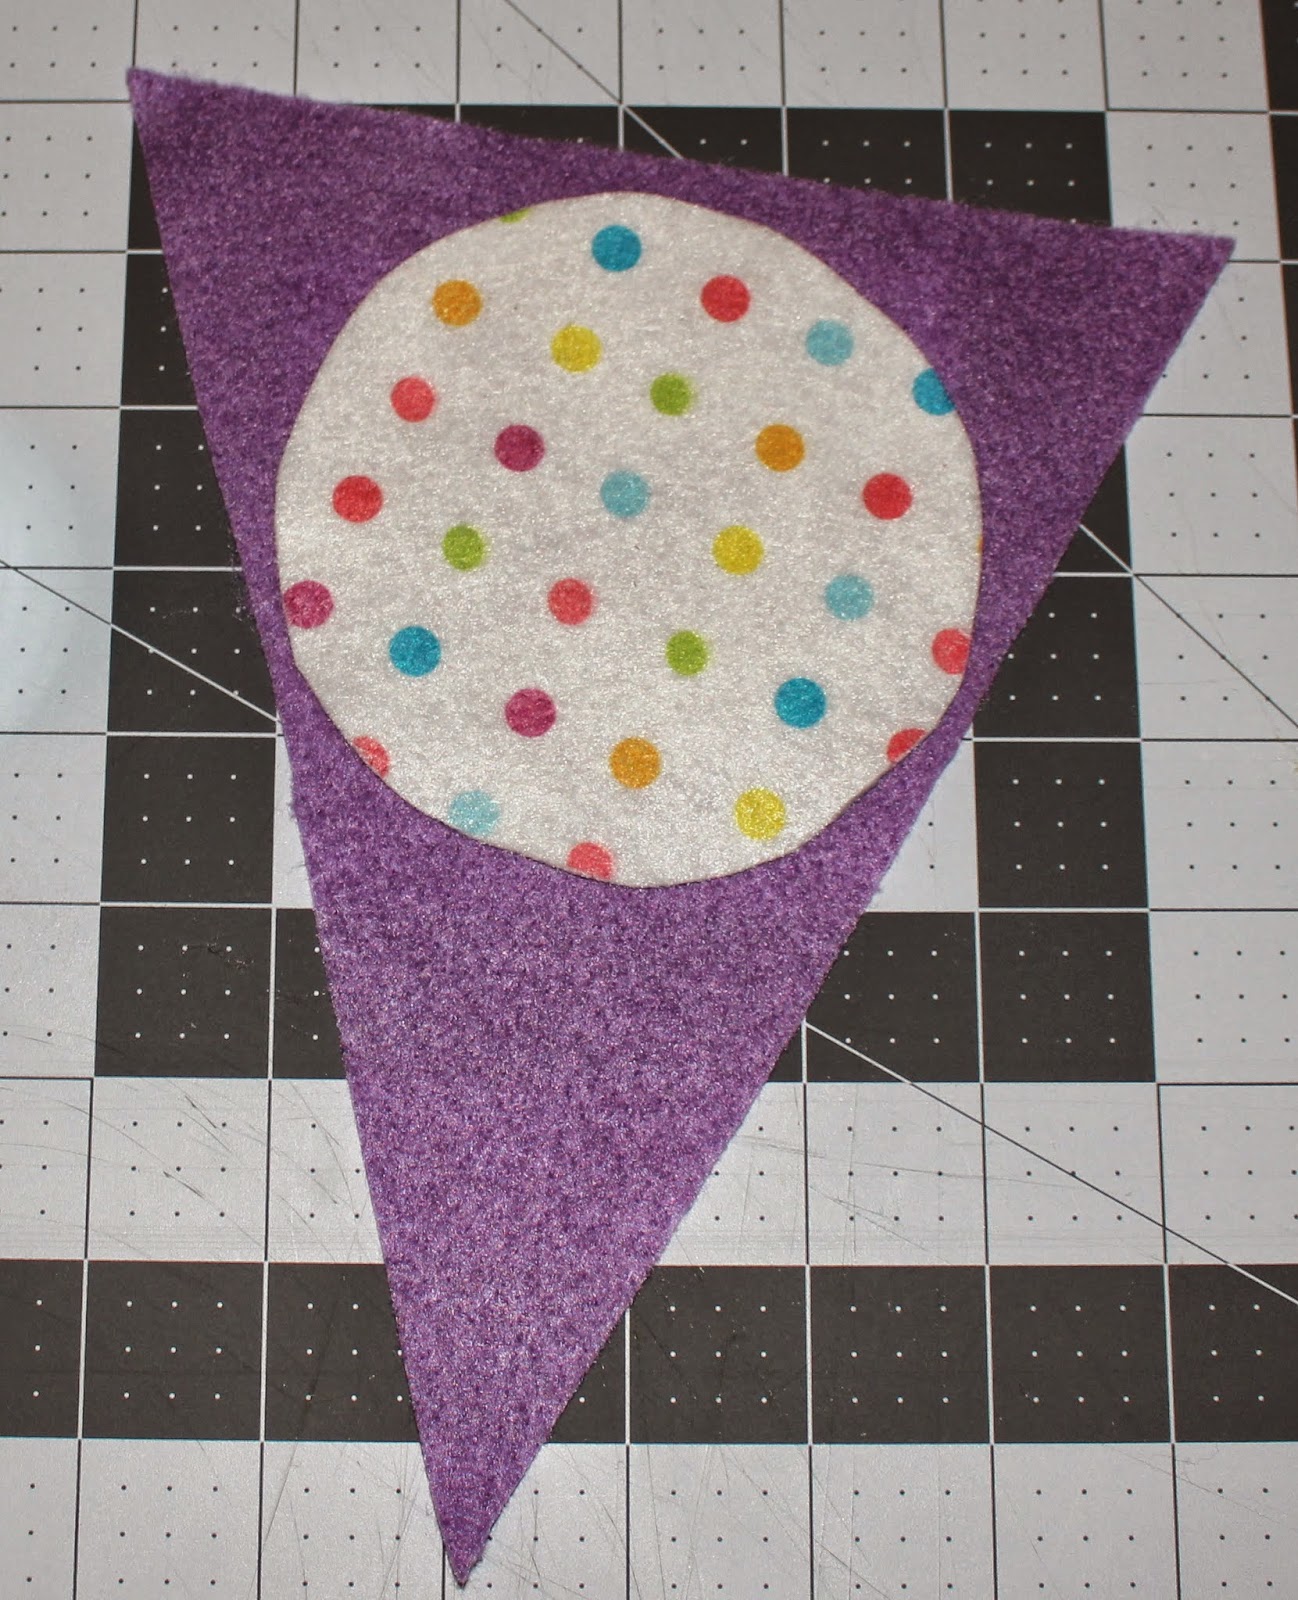
I used this polka dot patterned felt for the background of my letters. It's perfect for my theme! I needed 19 circles and could fit 4 on each sheet, so I bought 5 sheets.
3. Pom-Pom Trim.
I bought 4 yards and have a bit left over.
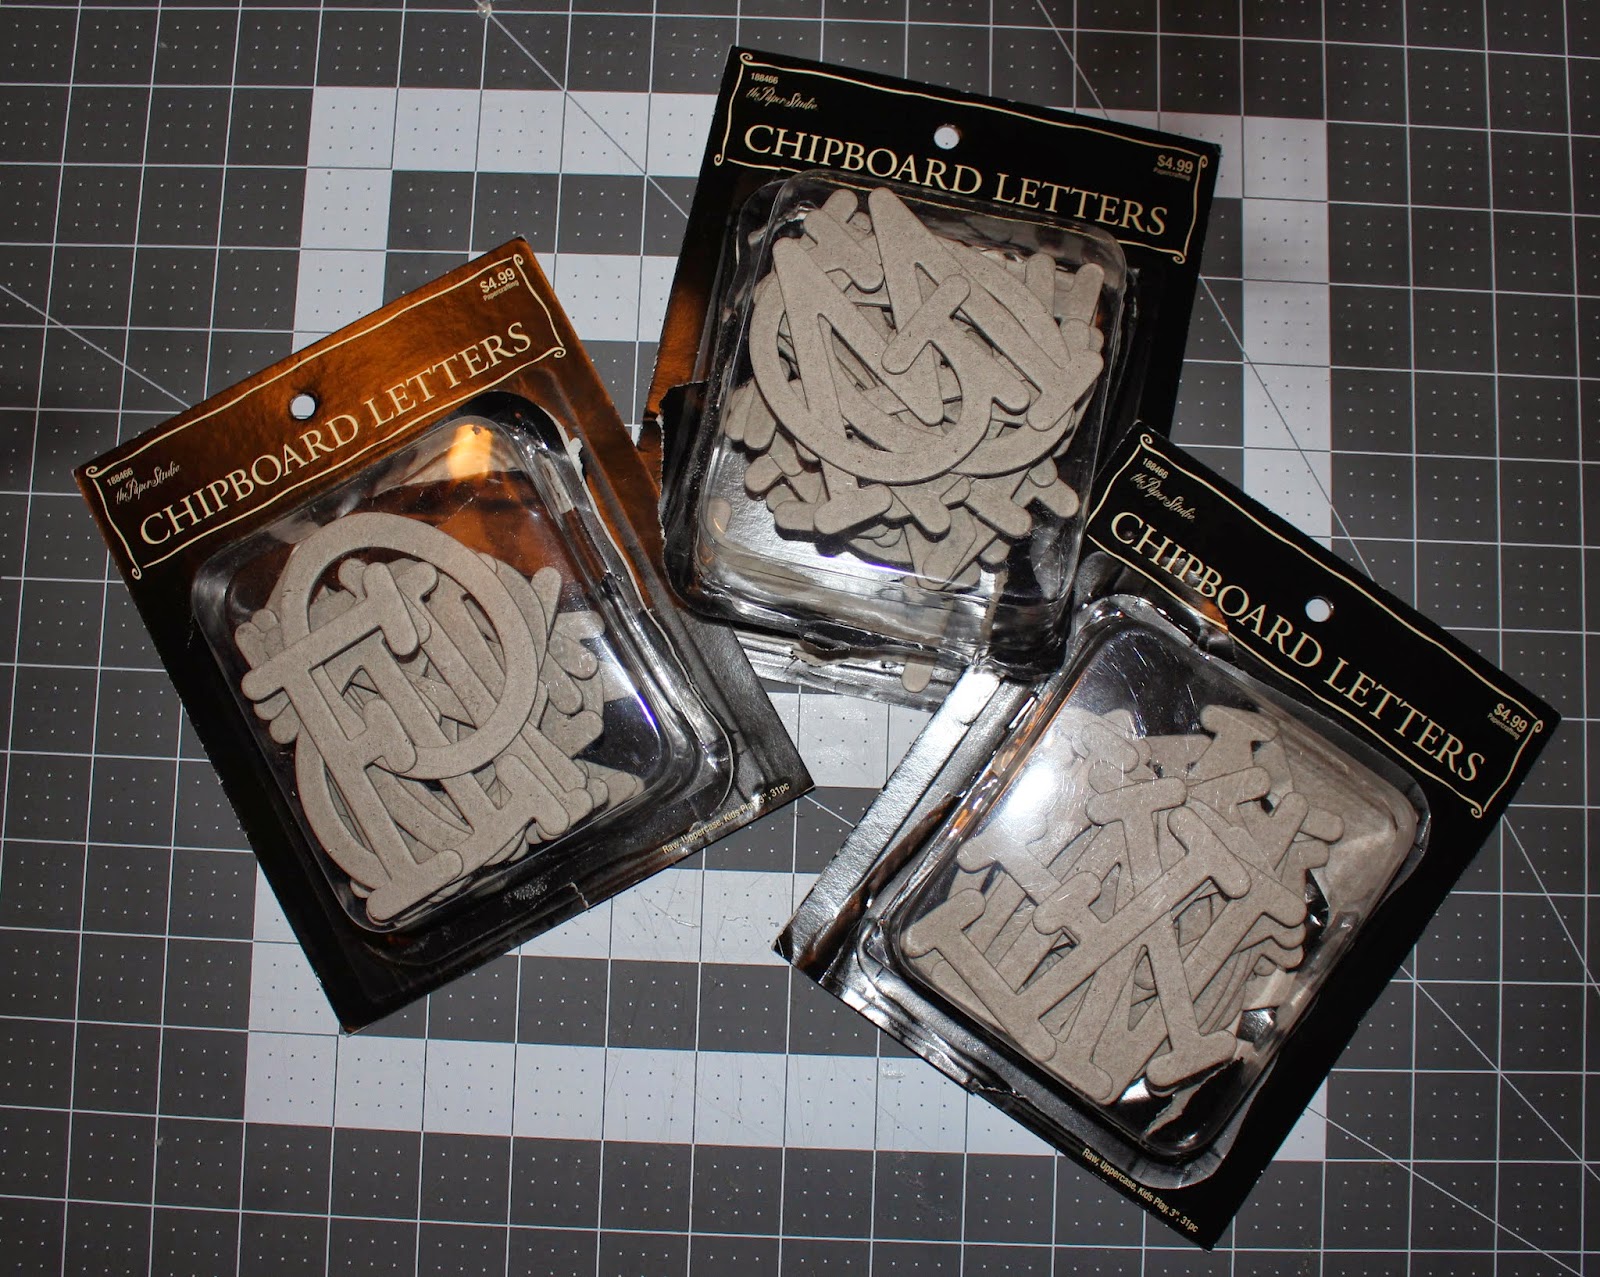
4. Letters.
I probably could have bought any letters for this--or made my own. But I loved the font in these 3" chipboard letters. I also like the idea of using them again so I wanted something sturdy. The packages I bought contain all the letters of the alphabet with two of each vowel. I needed 3 "H"s, 3"R"s and 3 "P"s so I had to buy 3 packages.
5. Spray paint.
Or any paint, for the letters. Unless you buy them already colored. I chose black to stand out well. Plus it seems a neutral enough color to use again!
Don't forget all the tools you'll need! Some adhesives, cutting tools & banner templates.
Okay, let's get started. Since your paint will need time to dry (if you've chosen letters that need painting), you better paint them first.
Remember I had to use 3 boxes of letters in order to spell out "Happy Birthday Harper." I'm already thinking of other ways I can use all the other letters here!!!
!!!!!
Head outside or to a well ventilated area. Lay out your letters. Use a dropcloth, otherwise you'll end up with a really bad paint job on the ground. And a very unhappy husband.
 | ||
| I tested craft paint on a letter to see if it would work. I didn't like the outcome, thus, I spray-painted. |
Apply several coats. The chipboard REALLY absorbed the spray paint.
Next, go inside and relax. Maybe take a nap (yeah right). Or make a margarita (right!).
Okay, back to work!!!
Now, let me pause here to say that you've got some figuring to do. I knew my banner had to accommodate the letters I chose. I also knew I wanted my letters on a circle. So I started there. I went all over the house picking up circular objects to use as a guide and set the letters on them to see if they would fit. It took some time but then I found a cup that would work. I traced a circle from the cup on a piece of paper. It was about 4" in diameter. THEN I took that paper circle and had to find banner pieces to fit the circle. I printed several templates online before I found one that worked. It had to be at least 4". It was almost 5". And I had to make my own triangle using the measurements from the paper circle. The triangles are 6.75" long on the top. Once I had the banner pieces figured out, THEN I measured how much pom-pom trim I needed. So essentially you work backwards.
Decide what shapes you'll want your banner to be in. I wanted triangles and two-point (or swallowtail) shapes. So I found a template for the swallowtail shape here. I used the largest one. As for the triangle, I just made a quick shape in Microsoft Word. You can get that here.
I used a rotary cutter to cut out my banner pieces.
Fold your felt piece in half "hamburger style"...
Lay your pattern on top and cut.
Since you folded your felt piece in half, you did twice the work in one cut =)
Do this for the rest of your banner pieces. For the triangles, I could only cut one at a time.
Next you'll need to cut the circles for the background for your letters. I used the top of a cup as my pattern (equaling about 4" in diameter) and then used my rotary cutter to cut the circles. I cut 19 circles - 4 on one sheet of felt.
Next, glue your circles to the banner pieces. You have several options for adhesives here. I honestly tried several:
~Elmer's Glue worked okay. But I noticed later that the circle easily came off. It doesn't stick to felt very well for very long.
~Hot Glue worked great! But hot glue is, well, hot. And it dries fast. And can get messy with all the little hot glue string thingys. So you've got to work quickly. And considering I had so many circles to do, I didn't want such a high maintenance option.
~Spray Adhesive won the competition. It worked the best, but it can be so messy. Watch your overspray.
~Rubber Cement has a trick to it. If you put the rubber cement on both surfaces, it'll be a stronger bond. If you only apply the adhesive to one surface, it becomes temporary and you can peel it off later. Don't believe me? Simply read the back of the bottle. This tidbit of information will come in handy later!
So now you've got your circles glued on, no matter which option you choose.
Lay out your pieces side by side. I left about 1/4" between each piece. Leave a few inches of trim hanging off the end to attach to push pins or tape or however you end up hanging the banner. Cut the trim.
Apply a quick line of hot glue to the top of your banner piece.
Firmly press the pom-pom trim down on top of the glue. Make sure your trim is straight as you add each piece of the banner!
Repeat with each section.
Lastly you'll add your letters.
Remember when I said I'd like to reuse the letters from this banner? Well how can I reuse them if I use permanent adhesive?
And remember how I said the back of the bottle of rubber cement said that it can be a temporary adhesive if you apply a layer of glue to only one surface?
Eureka!
So apply a layer of rubber cement on the back of the letter and then press your letter down firmly on the felt.
Before you know it, your banner is done!!
I knew it would be difficult (and/or expensive) to find a banner that was exactly the colors I wanted. Plus one I could easily take apart & reuse. WITH my daughter's name. Out of curiosity I grabbed the receipts and added up my total.
Pom-Pom trim - 4 yards @ $1.99/yd - $7.96
Chipboard letters - 3 boxes @ $2.49/box - $7.47
Solid Color Felt - 12 pieces @ $0.25/piece - $3.00
Polka Dot Felt - 5 pieces @ $0.50/piece - $2.50
Spray Paint - $1
TOTAL - $21.93 (plus a few bucks for tax so really about $24)
*Adhesives (already owned, but throw in a couple of dollars here if you don't have any)*
This banner could be even cheaper if you used yarn instead of pom-pom trim. Or buy a spool of cute ribbon for a few dollars. You can handpaint the letters or use stencils. Or print some off your computer. I can use the remaining chipboard letters in other projects and even reuse the letters I've used here. So $7.47 might seem like a lot of money, but you'll get more use out of the box of letters.
It may seem like a lot of trouble (& money) for a birthday banner, but I love it and know it will be perfect!!


![http://www.printable-party.com/free-party-printables.html#gallery[pageGallery]/1/](https://blogger.googleusercontent.com/img/b/R29vZ2xl/AVvXsEhFatzBYYzyMlgW93NjLiUk02MrrG2rB-bM_Af7ulB_g_T6ZvZstL0W9c0ZuQN0YZLyLQdtc7shYQFokfau83AepHKvTdQeFo0BnIoWGsP_h3K8gMyF0MfMpMYWwgunuzEqLfCrkNP3HCfl/s1600/swallowtail+template.jpg)


No comments:
Post a Comment